
Vyne for Magento (Adobe Commerce)

Our extension to the flexible and scalable commerce platform enables eCommerce businesses to benefit from Open Banking powered payments. The extension includes a number of front-end options that allow eCommerce businesses to customise how Vyne Pay with bank is displayed to customers.
This guide provides the step-by-step process of installing the Vyne for Magento extension on your website.
Before you get started
If you haven't already, please make sure you have signed up for a Vyne merchant account here .
Download extension
Find information about the latest Vyne for Magento extension below. You can also learn more about downloading third-party extensions on Magento here.
Recommendation
We recommend that you first install the extension in a development Magento environment that is a copy of your live store.
After you have verified everything is working properly on your development environment, you can safety install the extension in your live environment.
Contact support if you require access to sandbox credentials.
Installing the extension
- Backup your data
- Backup your store database and web directory. This can usually be done through the configuration panel of your hosting provider, we also recommend a database back up.
- Copying the code
- Download the "Ready to Paste Package" package from your customer account, proceed to unzip it.
- Use any SSH client to connect to your server. Bear in mind that the user should write permissions to this folder and its sub-folders.
- Create this directory under the root Magento folder:
app/code/Vyne/Magento - Upload all the files and folders from the extension's package to the directory you just created.
- Via SSH, navigate to the root Magento folder and perform the following command:
php bin/magento module:enable Vyne_Magento
- Using composer
- You can install the extension by running the following command line in your Magento root directory:
composer require vyne/magento
- Setup and deployment
php bin/magento setup:upgrade
php bin/magento setup:di:compile
php bin/magento cache:flush
php bin/magento setup:static-content:deploy\`
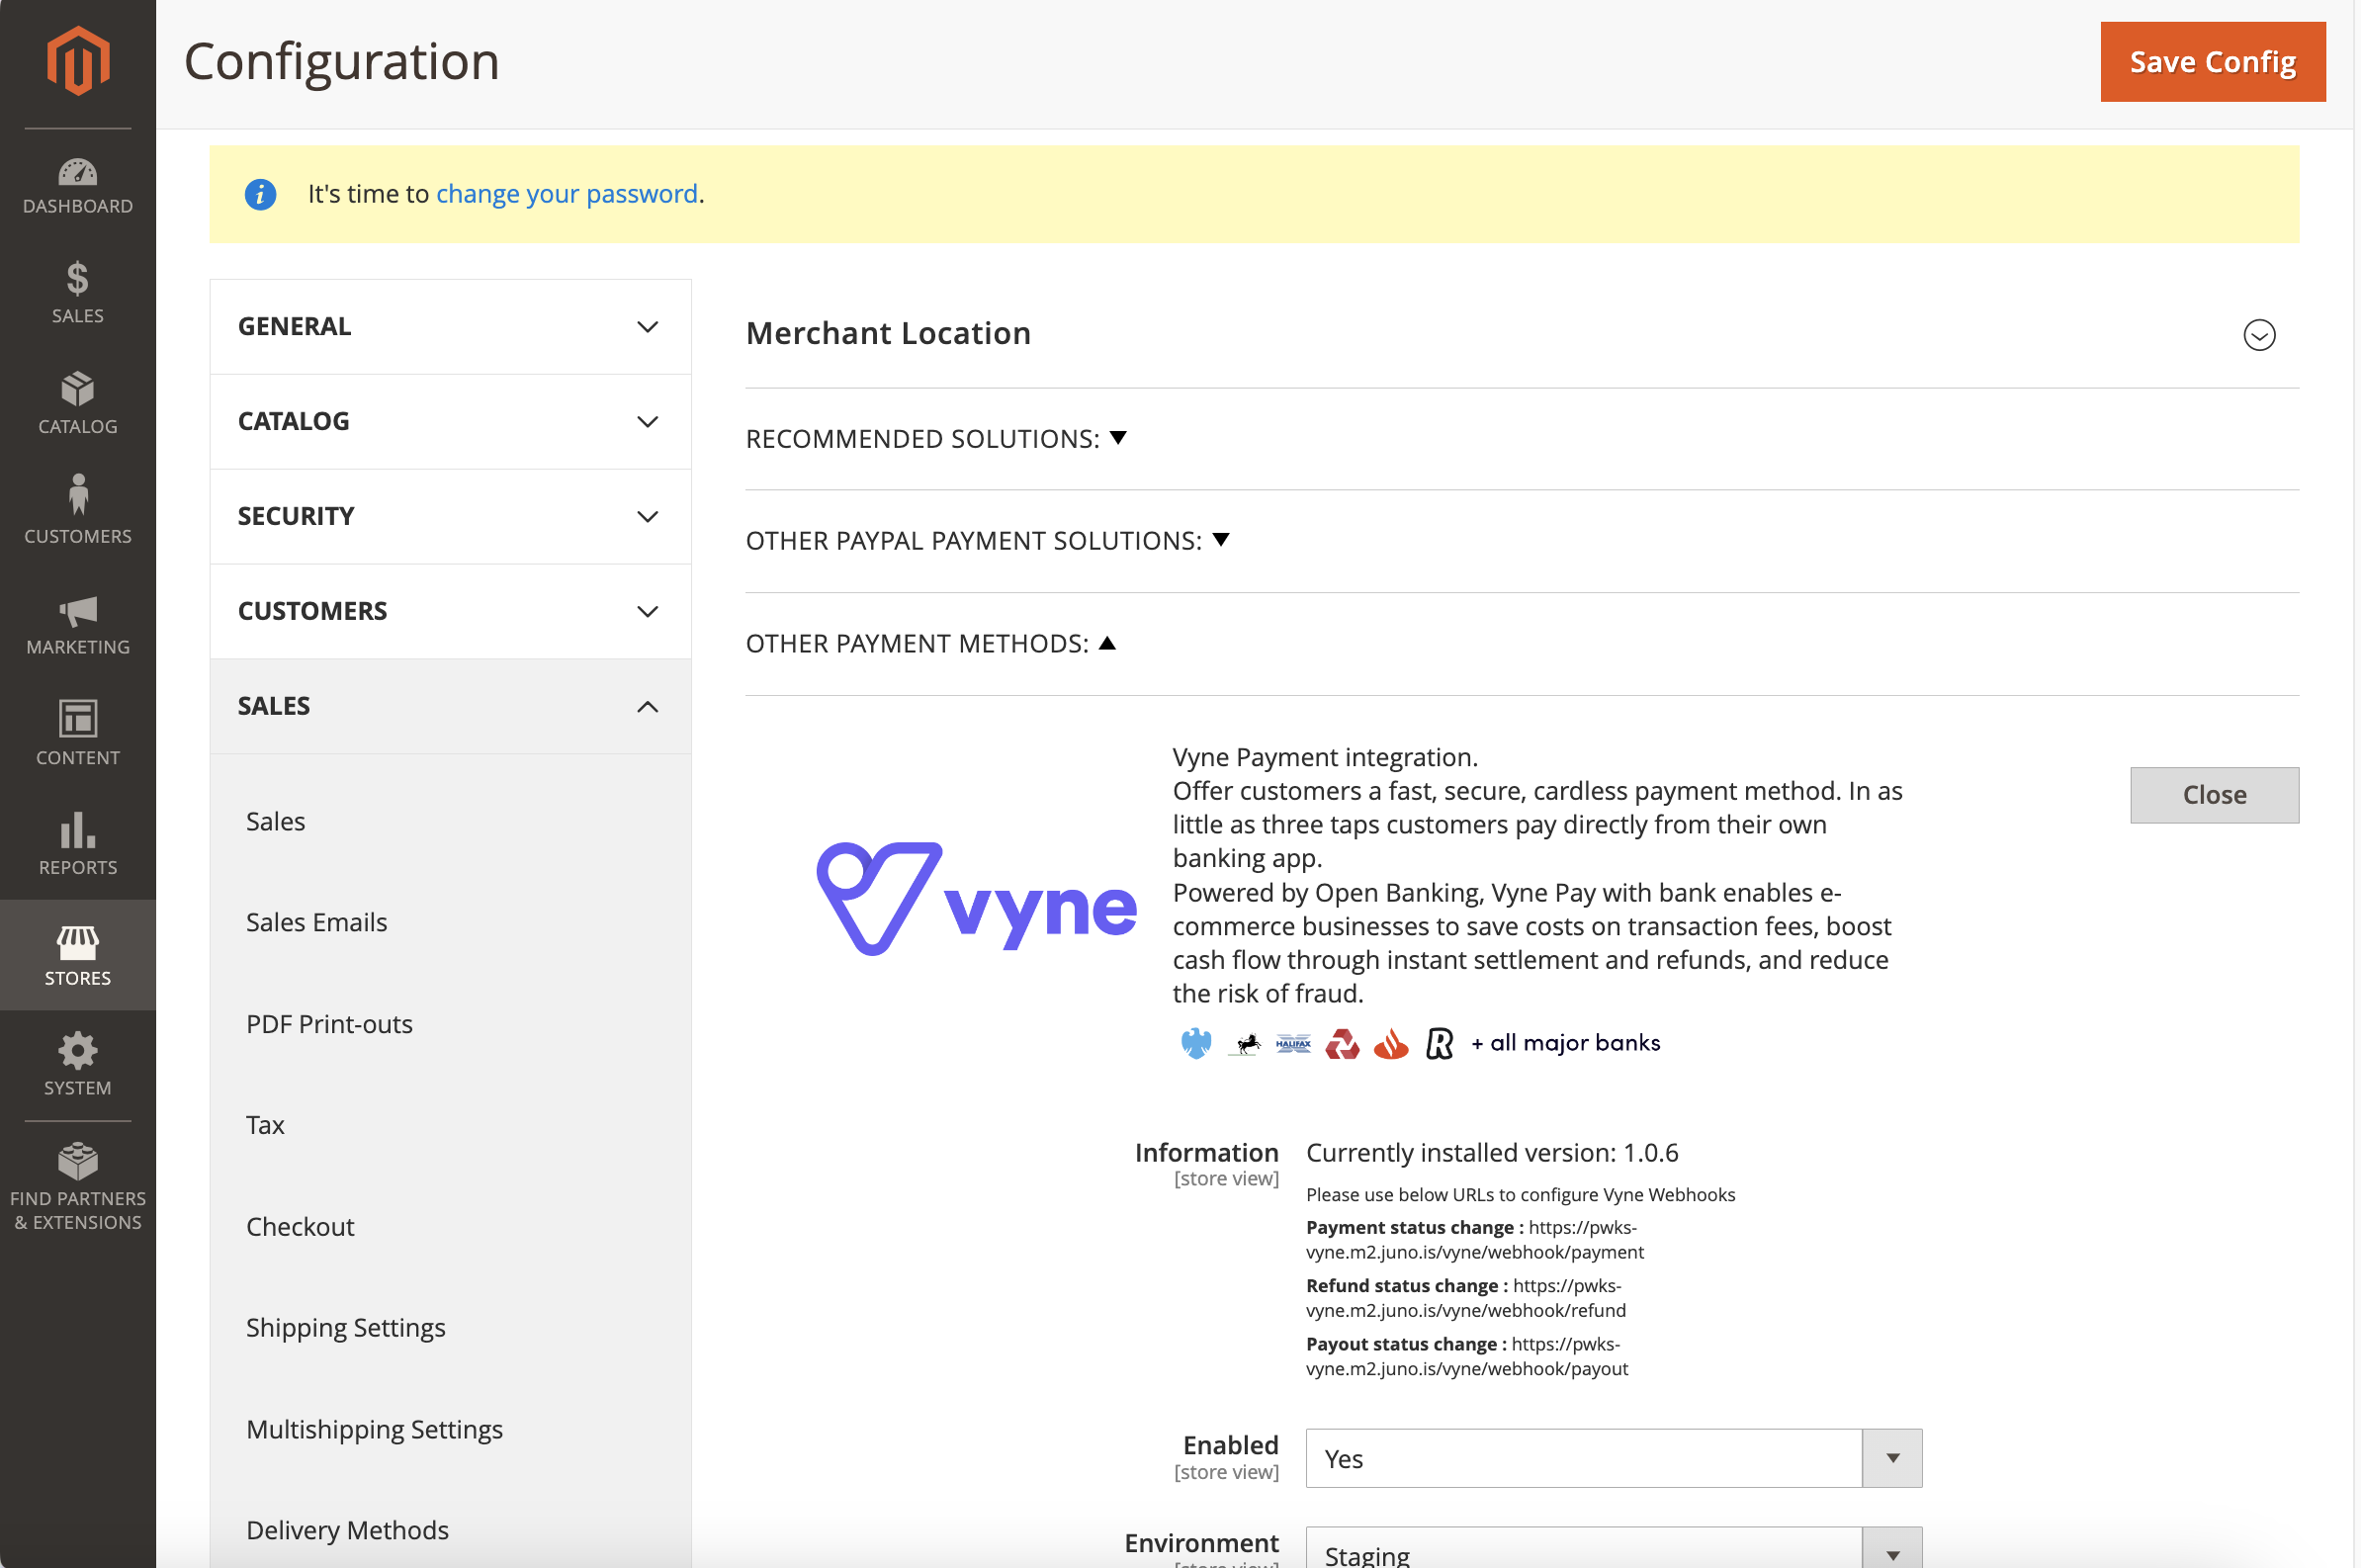
Locating the configuration panel
Once the Vyne for Magneto extension is installed, you'll be able to locate the configuration panel by following the below.
- Open your Magento admin panel
- Click Stores
- Click Configuration
- Under the sales tab, click Payment Methods
- Vyne will be visible under the Other payment methods dropdown.
- Click Configure to open the Vyne for Magento configuration panel
Linking the extension to your Vyne merchant portal
Next, you will need to link the Vyne for Magento extension to your Vyne merchant portal.
- Generate a key/secret pair to use as an access token, and enter the key in the Client Id field and the secret into the Client Secret field.
- Enter the settlement account code you wish to use in the Destination account field, then click the Save Config button.
Setting up webhook notifications
It's important that you setup webhook notifications after installing the extension to ensure your Magento site receives payment status updates.
Within the Vyne for Magento configuration panel, you'll be able to locate the webhooks URLs within the Information header.
- Payment callback URL:
https://pwks-vyne.m2.juno.is/vyne/webhook/payment - Refund callback URL:
https://pwks-vyne.m2.juno.is/vyne/webhook/refund
Good to know
Visit setting up your callback URL to learn how to input these into your Vyne merchant portal.
Updated 6 months ago