Testing your integration
Before you begin taking payments, it's important you thoroughly test your integration with a mocked bank connection to simulate a real payment flow. Testing covers making a range of payments with different outcomes, refunding a payment, and ensuring you're able to view and understand your payments and their status in the Merchant portal.
1. Make a test payment
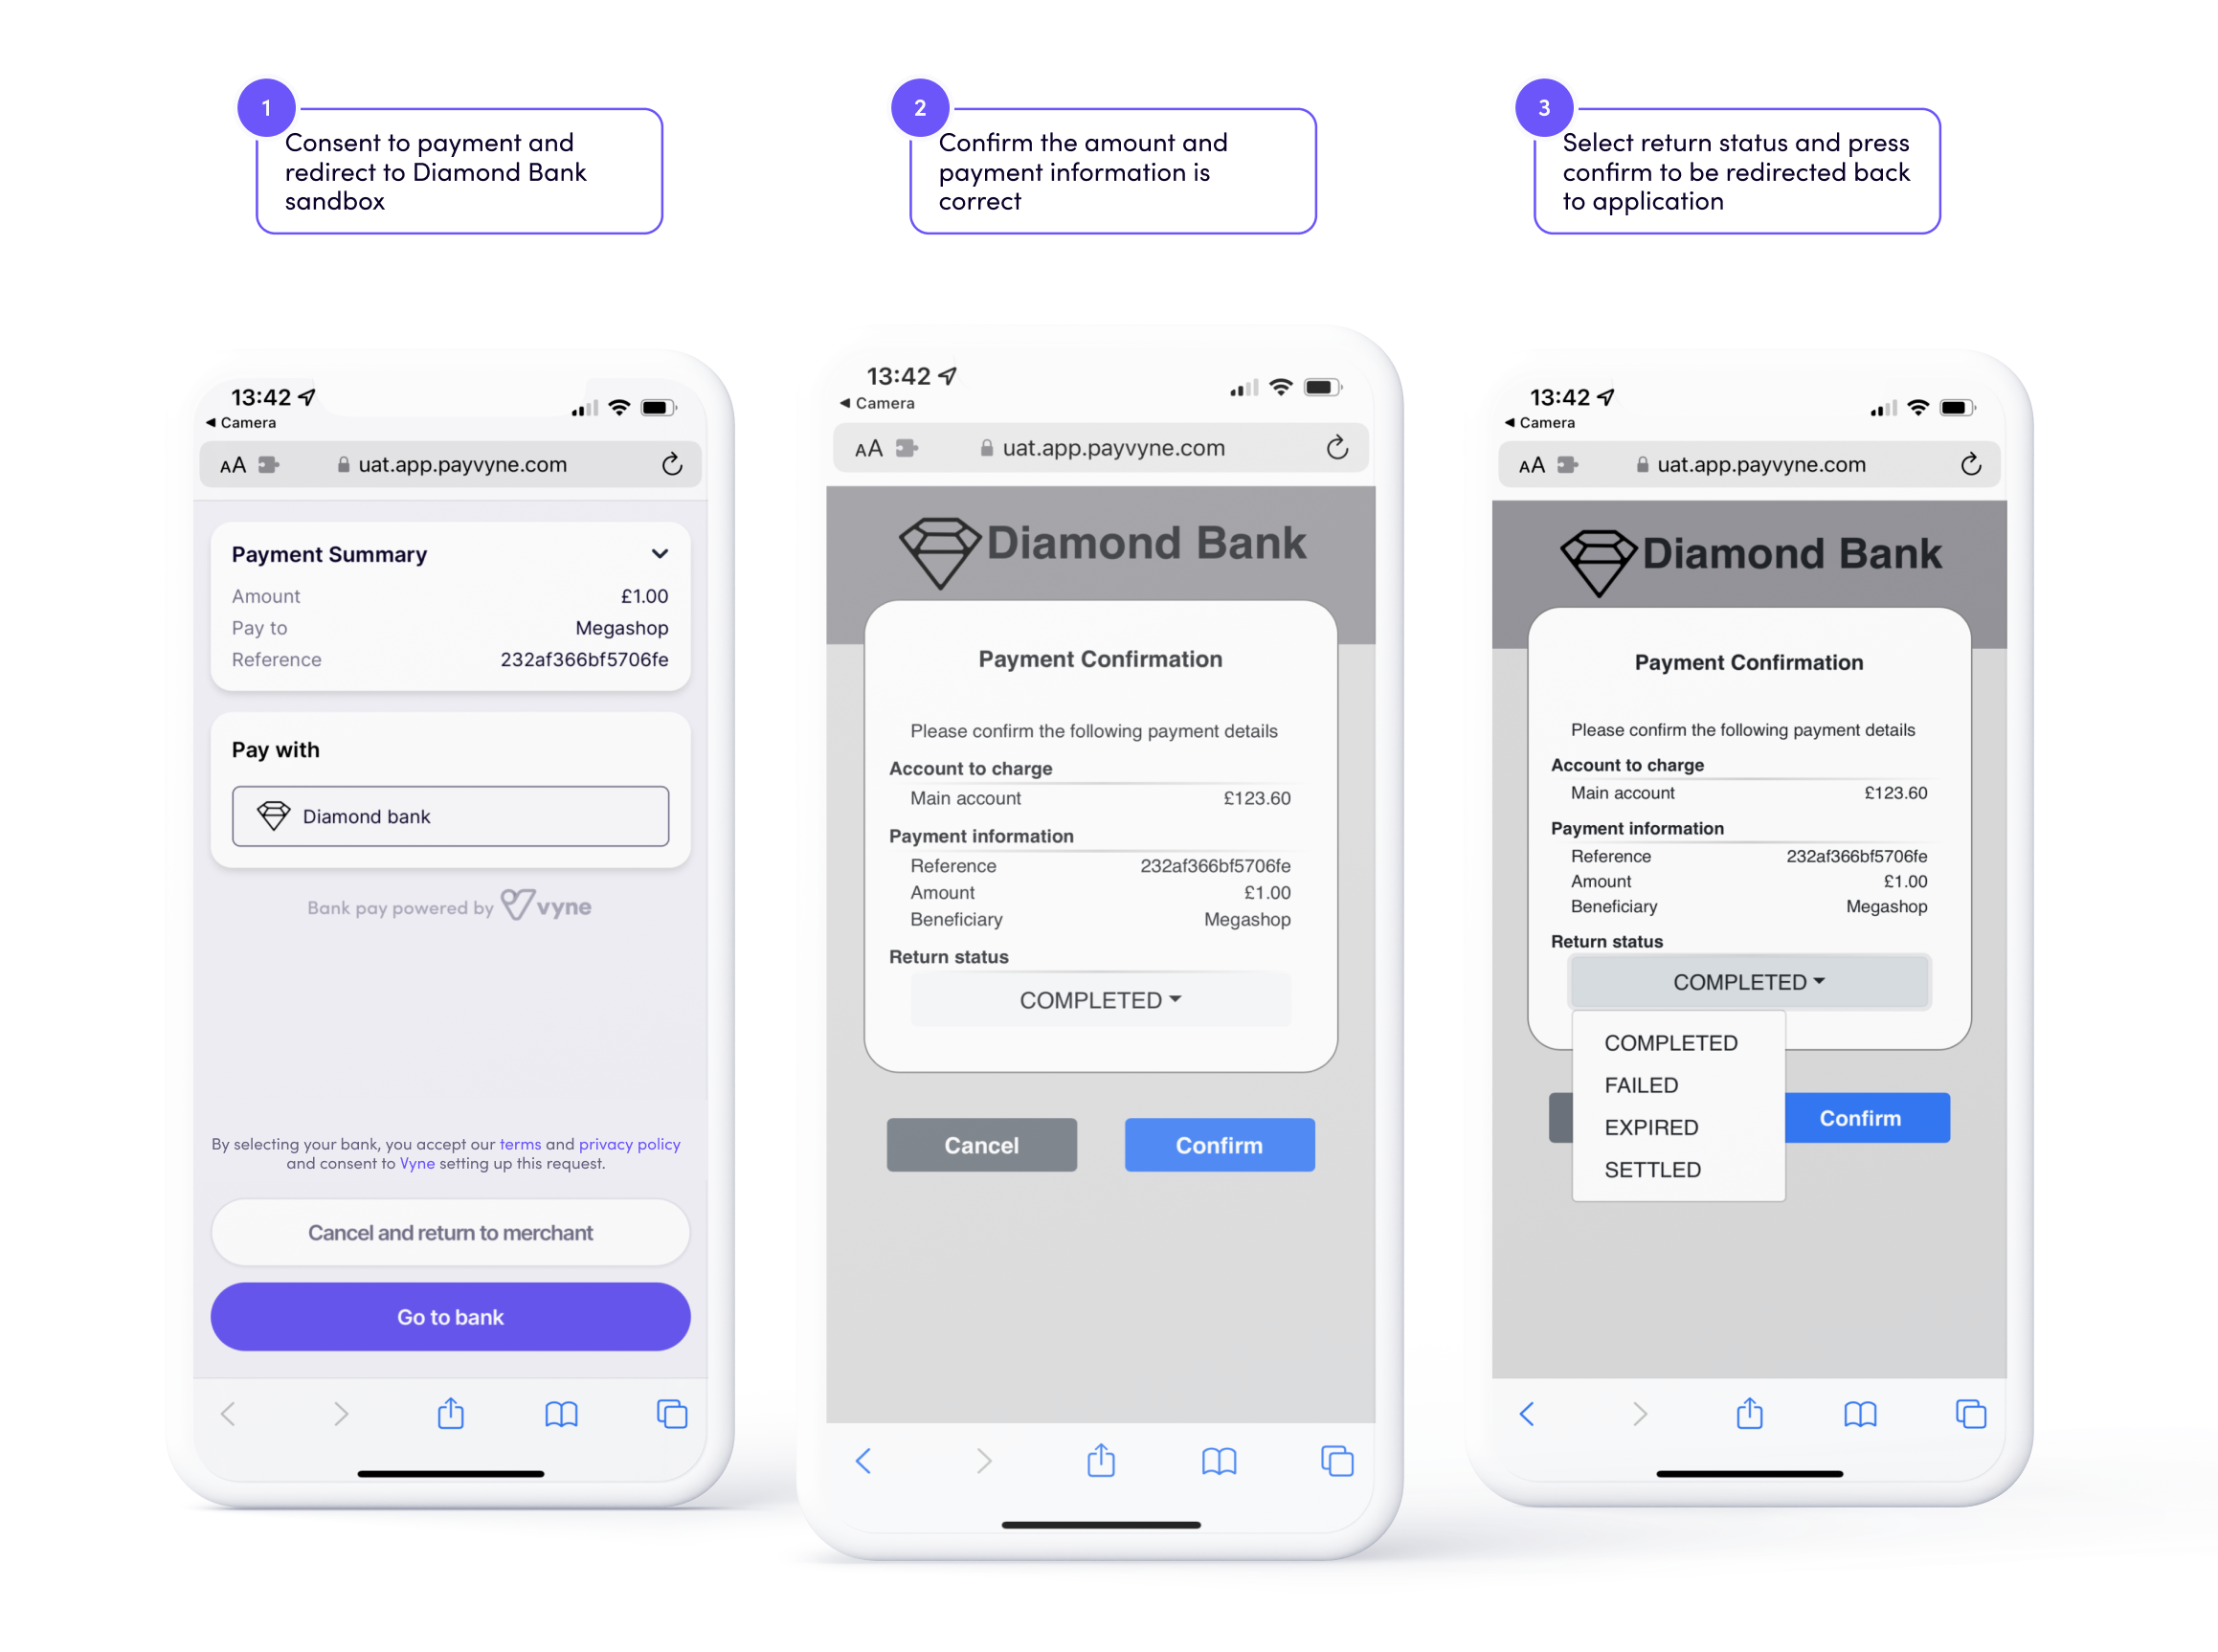
In order to test the hosted checkout payment flow using in our sandbox environment, we provide a mocked bank connection to 'Diamond Bank'. This can be used to emulate a mobile banking app experience. Diamond Bank recreates the experience of biometric authentication and allows the testing of different payment status outcomes.

a) Request payment
Request a single payment and open the hosted checkout .
- Make a PIR and redirect to the
redirectUrlreturned to open the hosted checkout. - In the hosted checkout, choose 'Diamond Bank' and tap 'Go to bank' to redirect to the mocked bank experience.
- Once in Diamond Bank, confirm the payment reference (this is also the payment ID), amount, and beneficiary.
b) Check payment statuses and callback
Use the range of return statuses to ensure your application can handle all payment outcomes.
- From viewing a payment in Diamond Bank, tap the 'Return status' dropdown to see a range of statuses available for this payment.
- Select a Return status to simulate and tap 'Confirm' to close Diamond Bank, and redirect to the callback URL specified in the PIR. The payment status will be updated to the Return status selected, and you will receive a webhook notification.
- Alternatively, tap 'Cancel' to return a
NO_CONFIRMstatus when redirecting to the callback URL.
c) Receive webhook notifications
We recommend your application should use both callback URL payload and webhook notification payment status updates. A webhook notification will be sent to your callback URL every time the payment status changes.
2. View your test payments
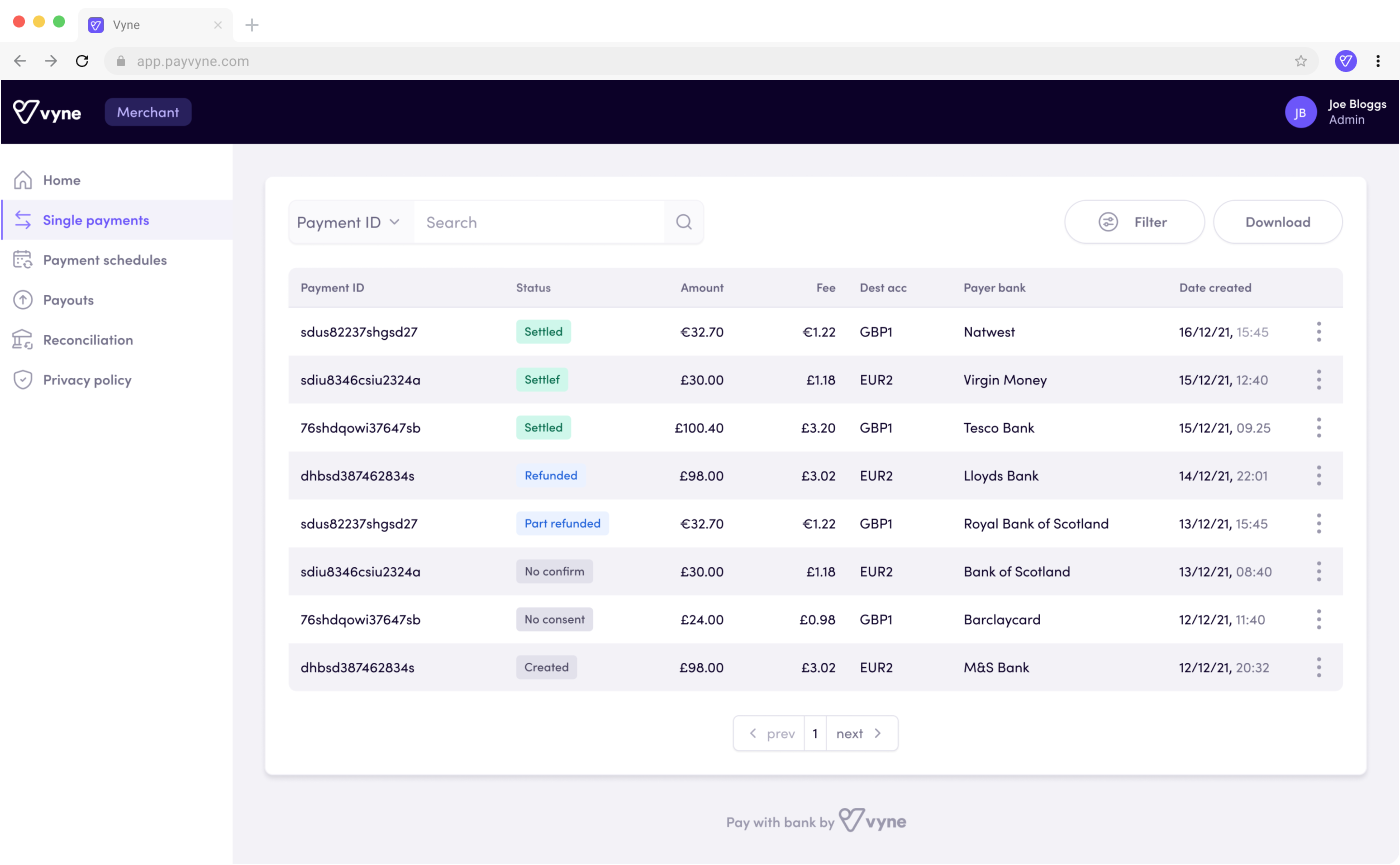
Records of every payment can be viewed in the Payments and Reports pages in the Merchant portal.

Use the Payments page to filter all payments or lookup a payment by ID, and use the Reports page to generate a report within a date range on screen, or download the payment report data in a CSV.
Here, you'll find:
- The payment amount and currency
- The payment date and time
- The payment status
- The payment ID (also known as the consumer's payment reference)
- The destination account the payment was requested to
- The payer's bank (if selected)
- The payment description
3. Refund a test payment
In order to refund a payment, you'll need to have a settlement account set up in your Vyne merchant account, and have made a test payment into a destination account (which is a settlement account) with a SETTLED status.
- Make a PIR and store the payment ID returned.
- Redirect to open the hosted checkout and select
SETTLEDas the Return status. Tap 'Confirm' to close Diamond Bank. The payment status will be updated toSETTLED, and you will receive a webhook notification. - Create a RR with the stored payment ID.
- Two webhook notification will be sent to your callback URL: one containing the payment status, and another containing the refund status.
4. Prepare for live payments
When you are ready to take payments from consumers in production, get in touch. We will be able to review the content and status of your test payments to ensure everything is ready to go. We can also answer any final questions and give you an idea of what to expect as you launch with consumers.
Once you've decided on a launch date, we will then create a production merchant account, where you can generate an access token for the production API. Production URLs can be found here.
Updated over 1 year ago
